Quickstart Guide
This is a quickstart guide for writing your first Discord bot, specifically geared towards those with light programming and/or Python experience.
Guide Outline
Before You Start
This quickstart guide assumes the following:
- You use and understand Discord.
- You own your own Discord server or hold administrator privileges for a Discord server.
- You understand the basics of Python or a similar programming language.
- You have the latest version of Python installed on your computer.
For guidance with the above, refer to the following resources:
- Beginner’s Guide to Discord
- Discord Support: How do I create a server?
- W3 Schools Python Tutorial
- Python Download
Set Up Your Discord Developer Portal
Navigate to the Discord Developer Portal and log in with your Discord account. You may need to confirm your email address when you first connect your account to the Developer Portal. When you’ve successfully linked your account, you’ll see the main Developer Portal page:

Create a Bot Application
1. Click the New Application button on the top-right of the above page.
2. Give your bot application a name, and review and agree to the Discord Developer Terms of Service and Developer Policy. Click Create on the bottom-right of the window.

You should then see the following page:
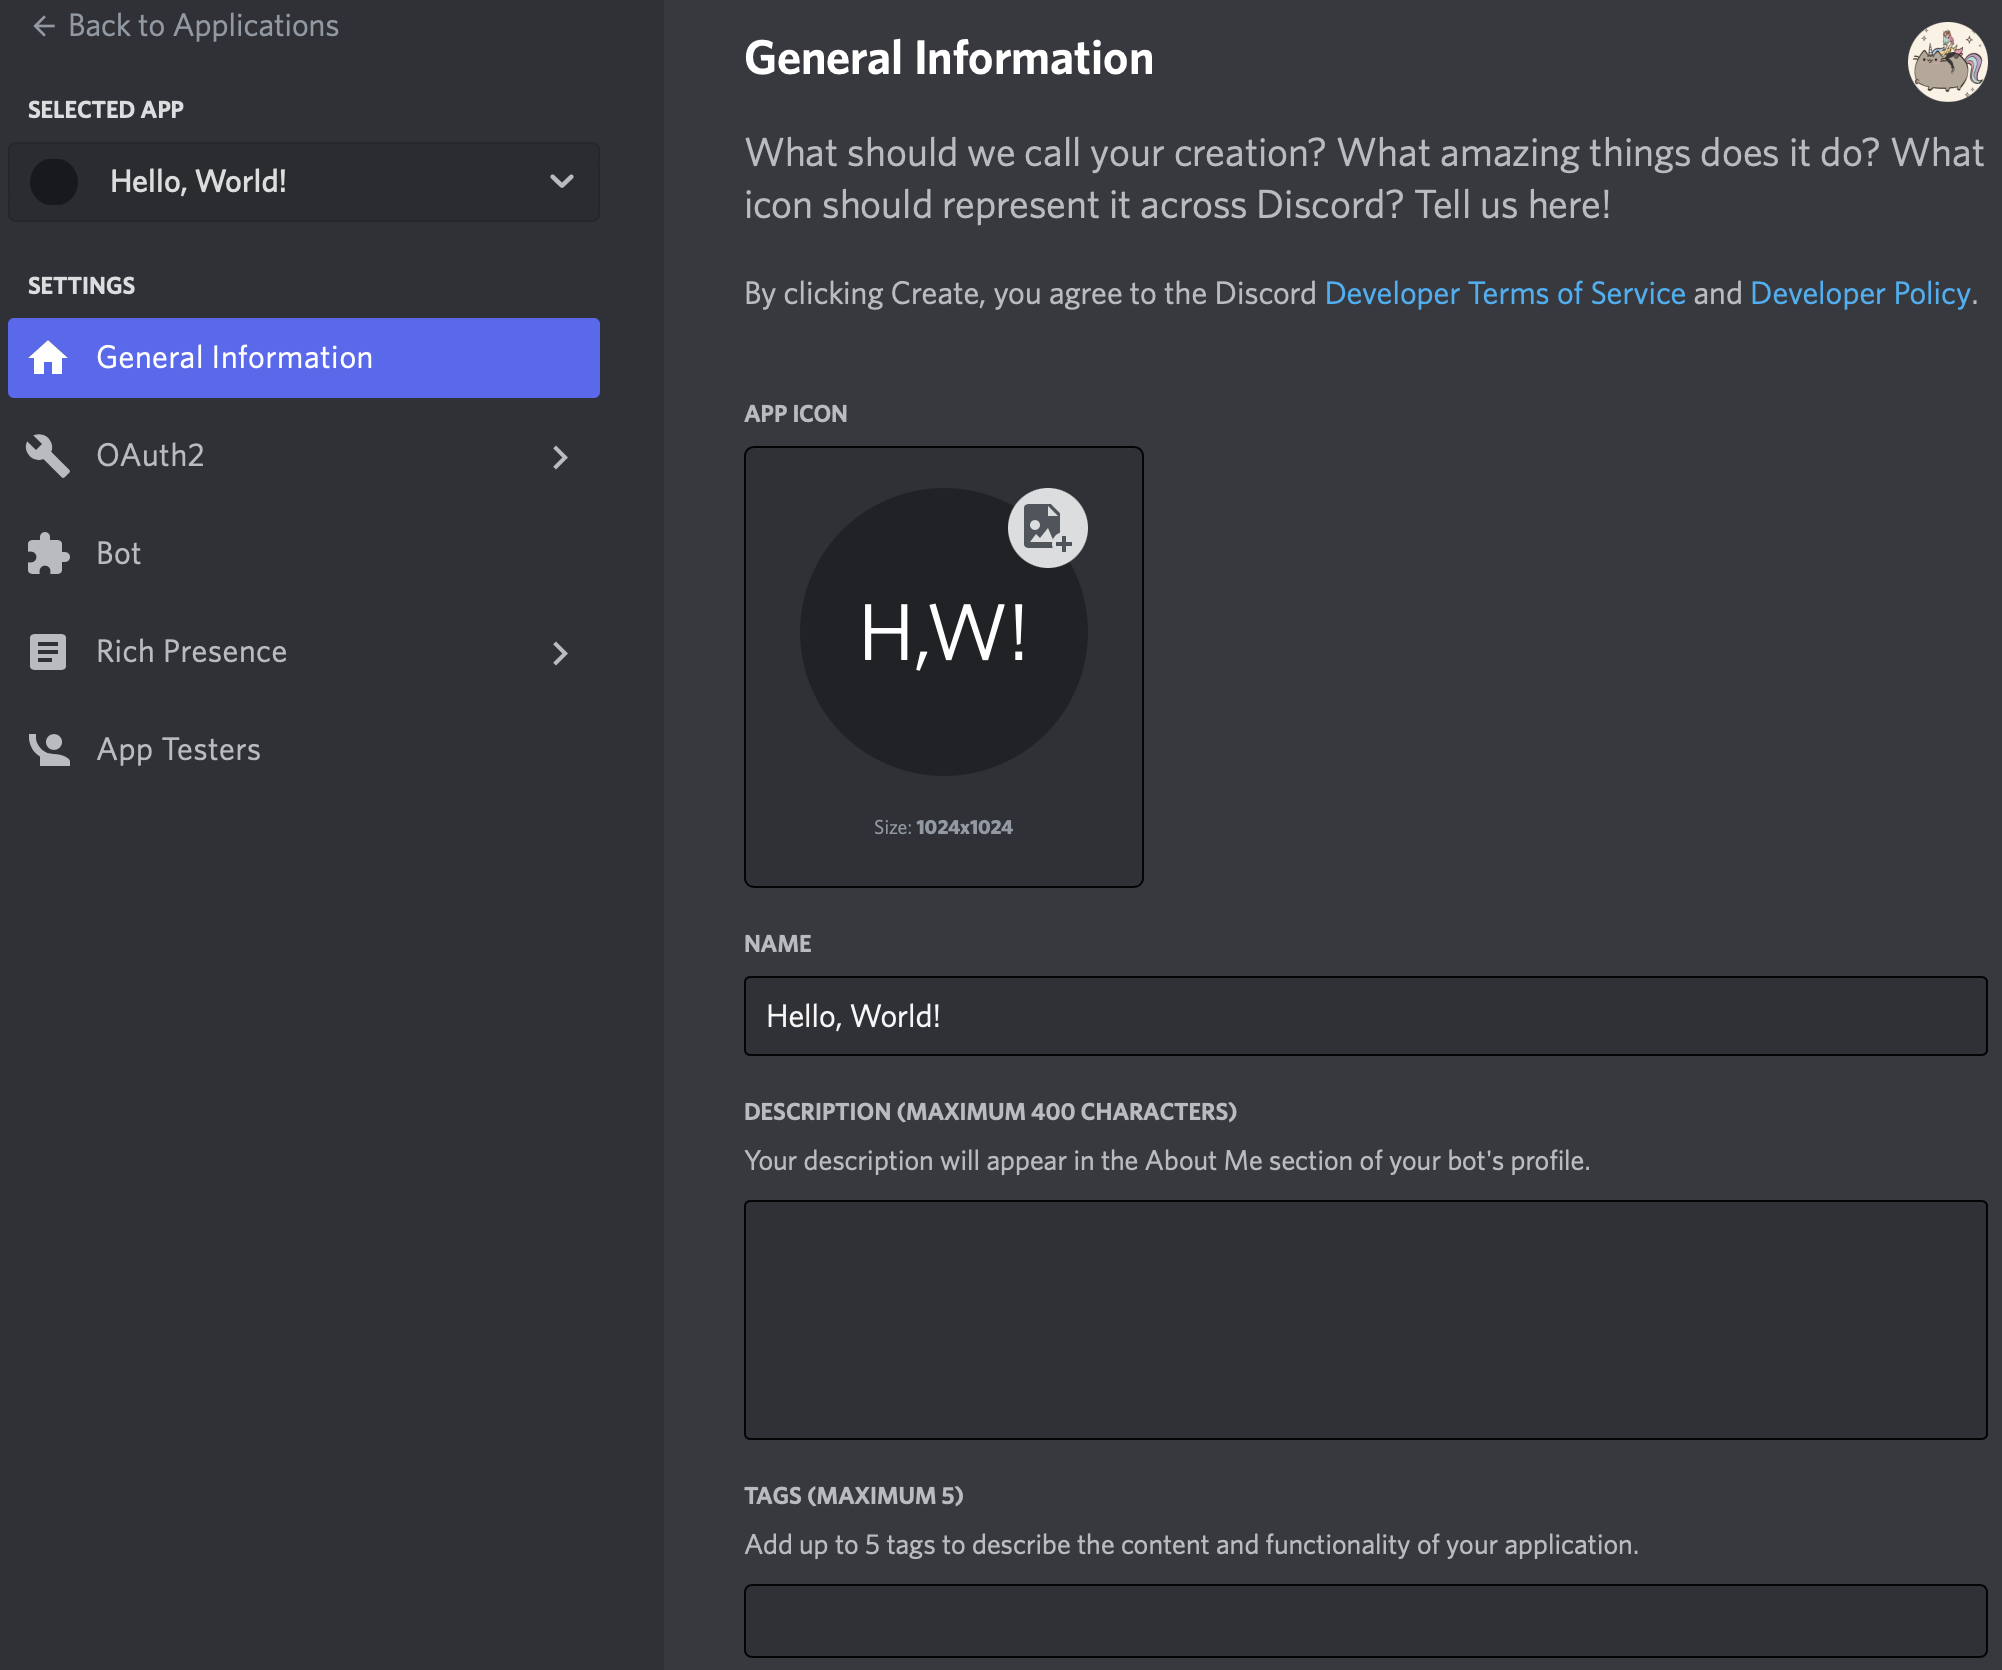
3. Optionally, add additional information about your bot in the description and add tags to describe the content and functionality. You may also complete this later.
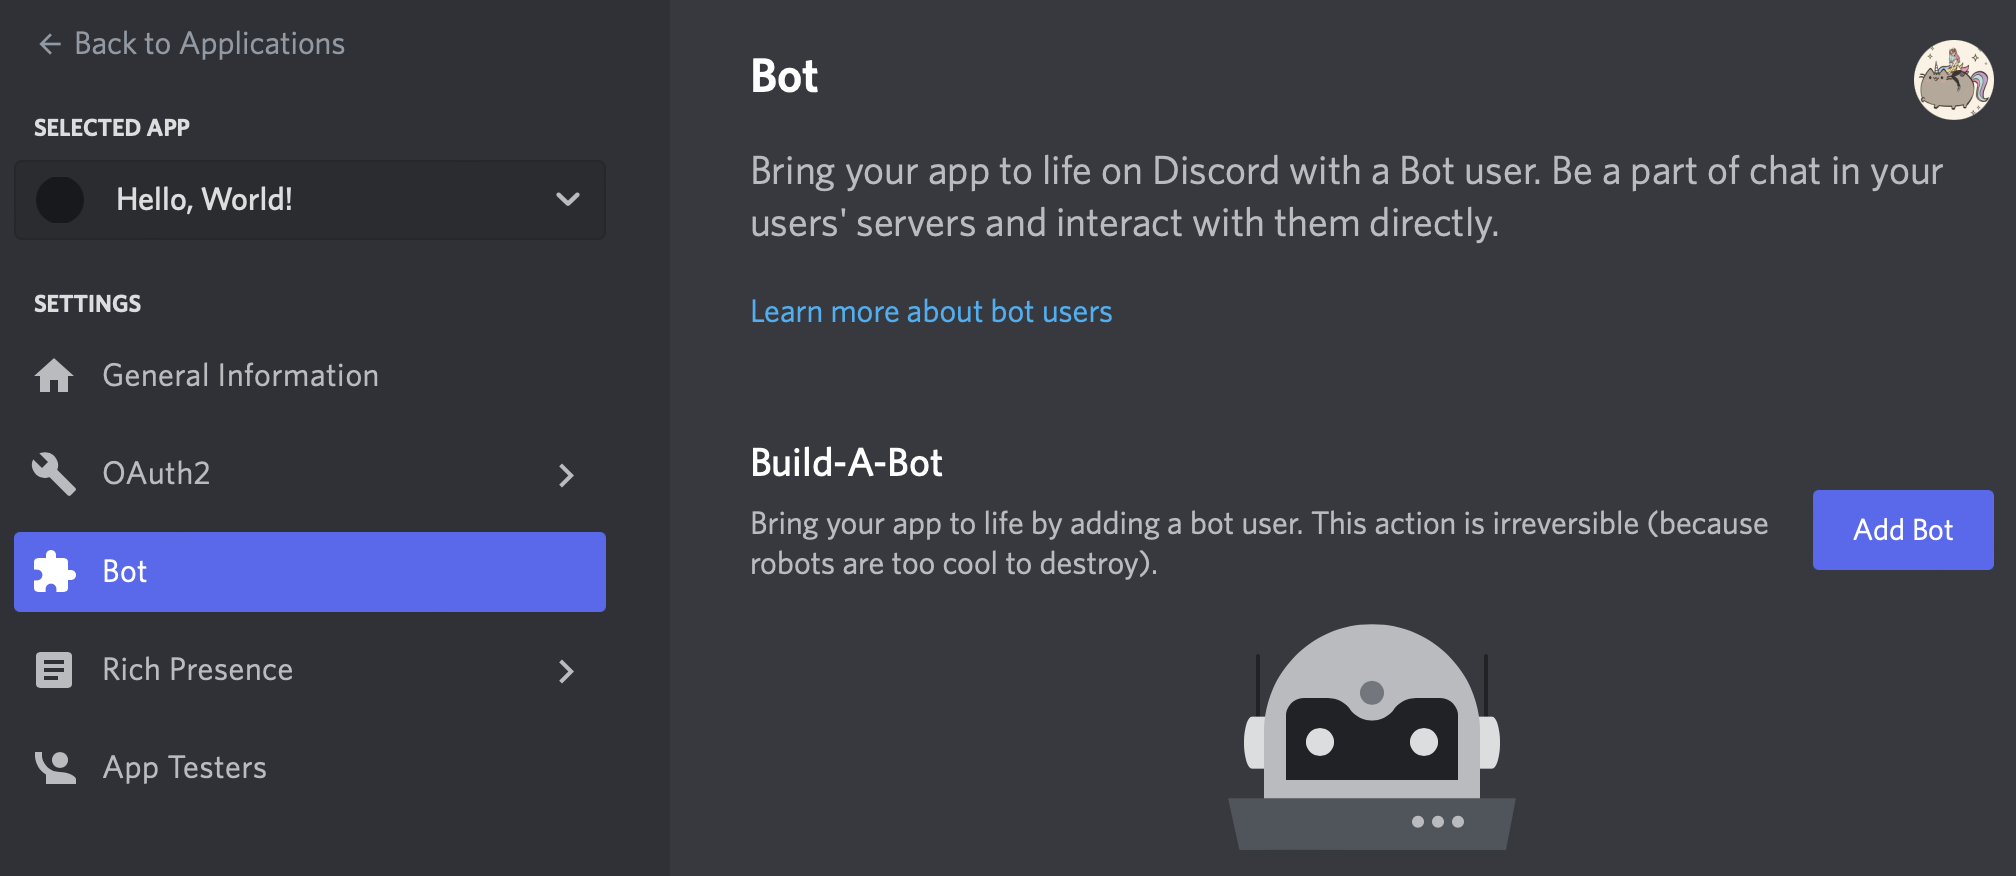
4. Select Bot from the Settings menu on the left side of the page, then Add Bot. When prompted to add a bot to this app, select Yes, do it!! After creation, you’ll see your bot’s settings:
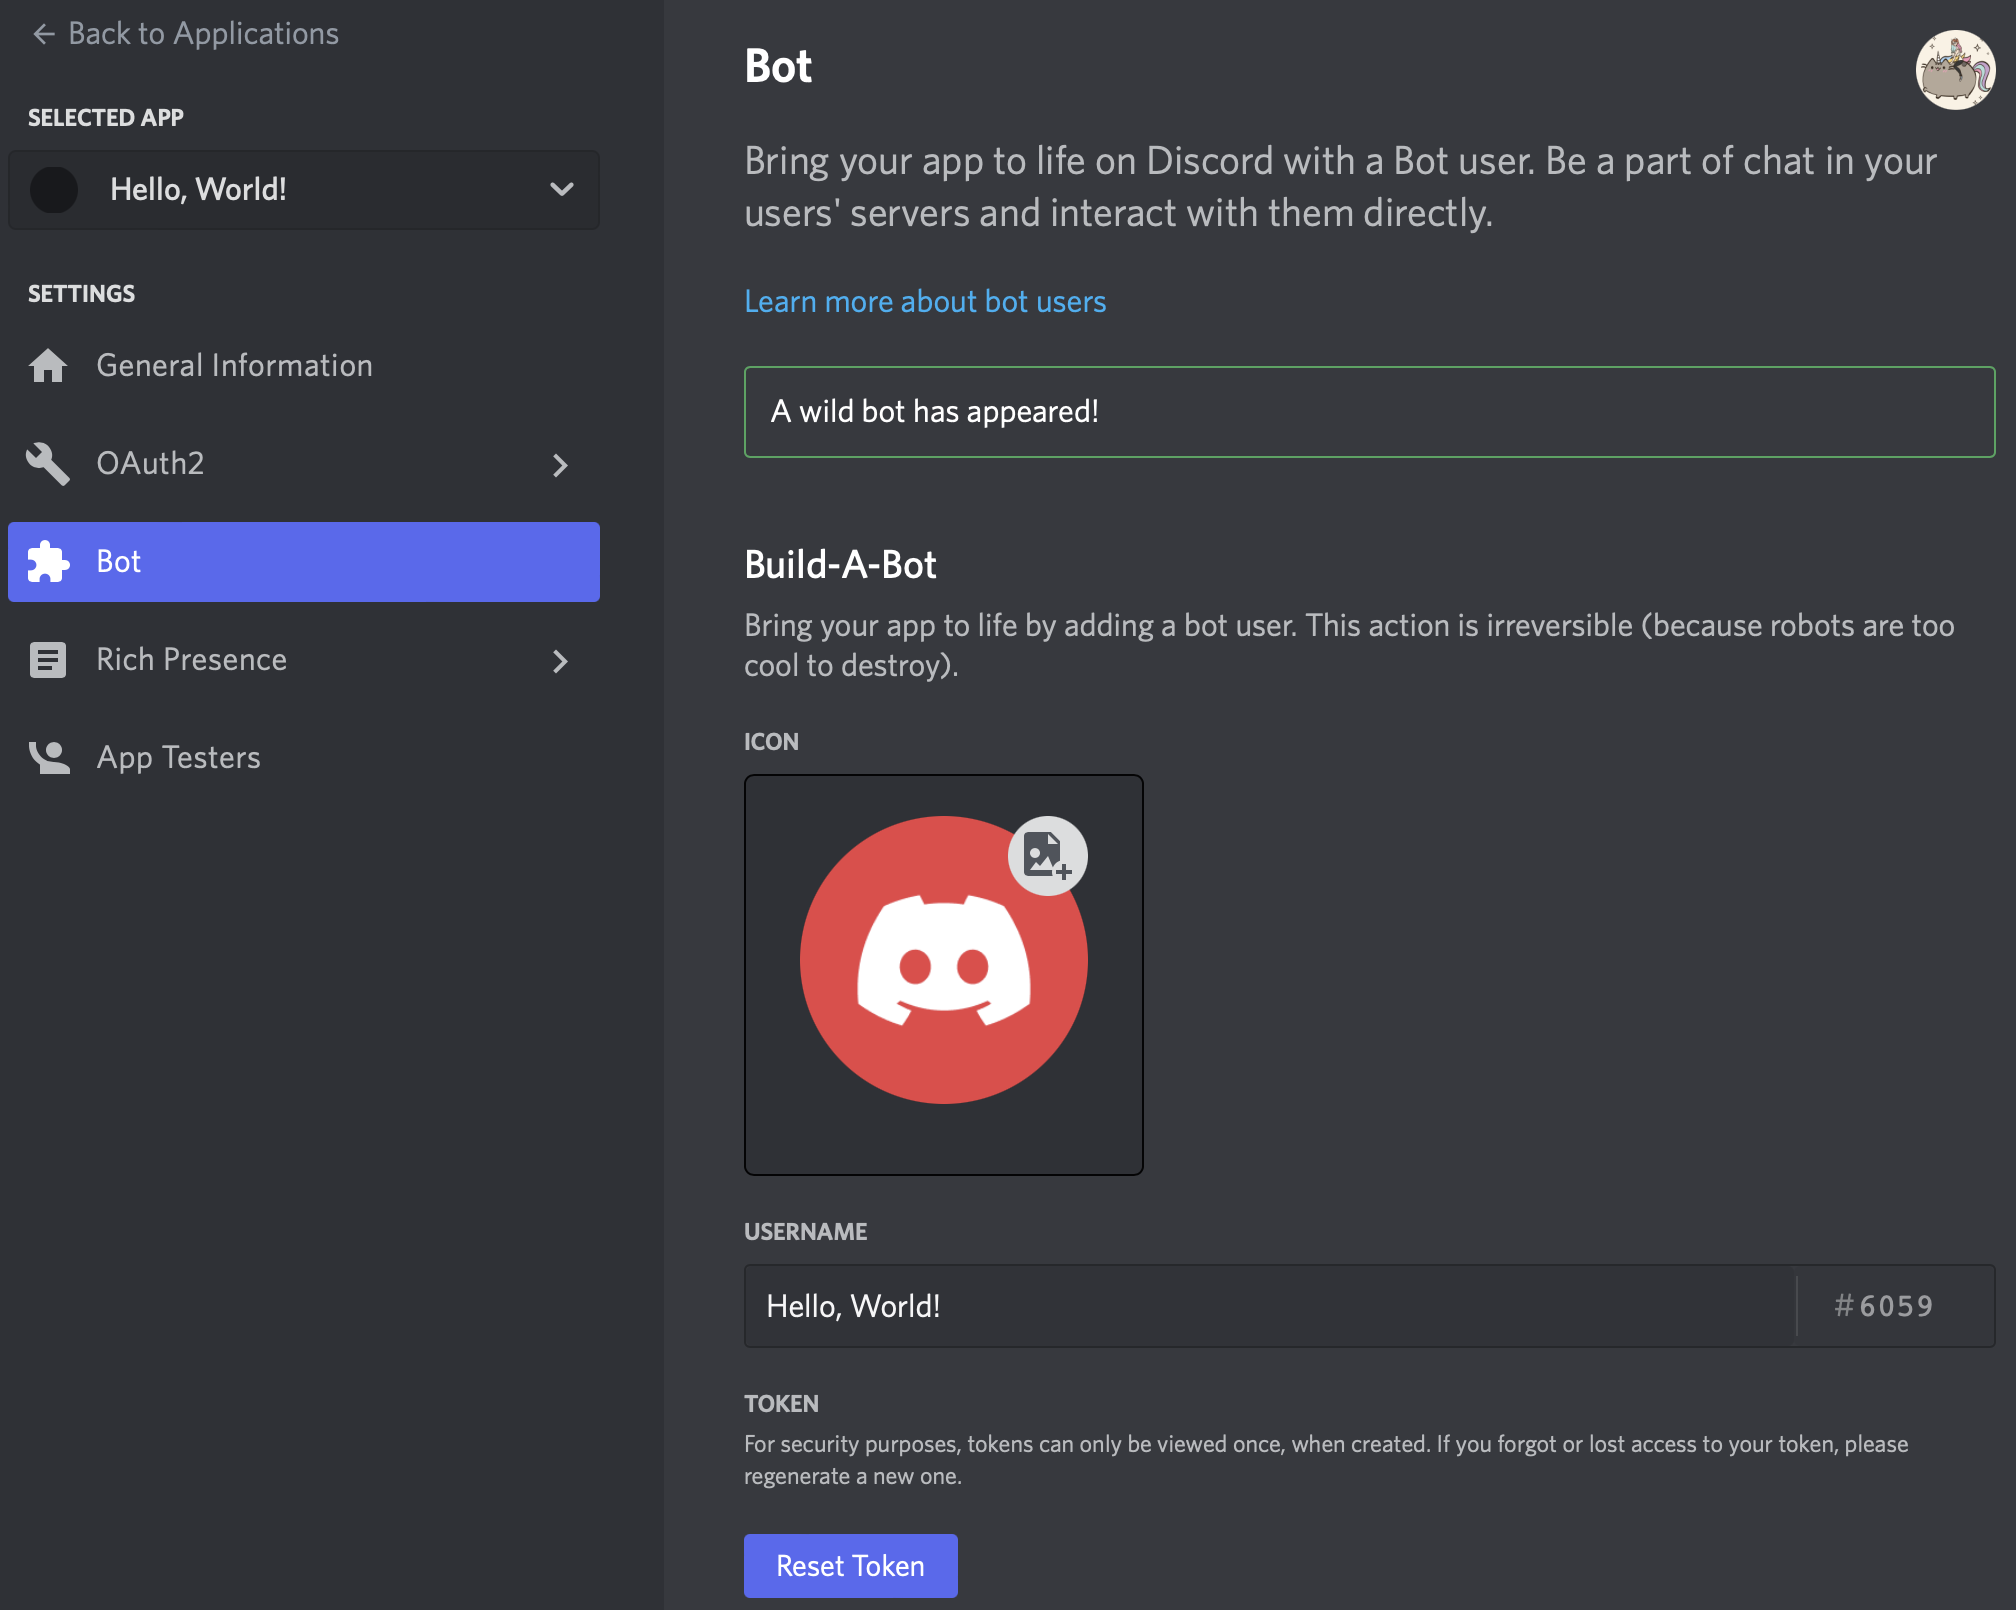
5. You may optionally add an icon for your bot or change its username.
Link Your Bot to Your Server
You’ll need your bot’s unique API token to connect it with your server and perform fun commands.
Note: Keep your API token private (otherwise other people can control your bot) and save it to a secure location. Keep this in mind if you plan to host your code publicly, such as on GitHub. This guide covers some basic information, and Black Tech Divas offers a more detailed tutorial on how to keep your API keys private. You can reset your token at anytime if it is accidentally shared, but you’ll need to update it in your code.
1. Click Reset Token, then Yes, do it! A long string of text, your API token, will appear:

(I have reset my API token since creating this guide. Your API token will be different!)
2. Click Copy. Open a text editor, paste the token, and save this text to a secure location. We’ll use it soon.
Next you’ll need to set the permissions, what your bot is able to do, scope, and where your bot can access information. We’ll first set the scope.
3. Under Settings on the left-side of the page, select OAuth2.
Note: OAuth2 is a common tool that allows an application or website to access information from another host. In our case, it will allow our bot to access resources from Discord.
4. Under Scopes, select bot.
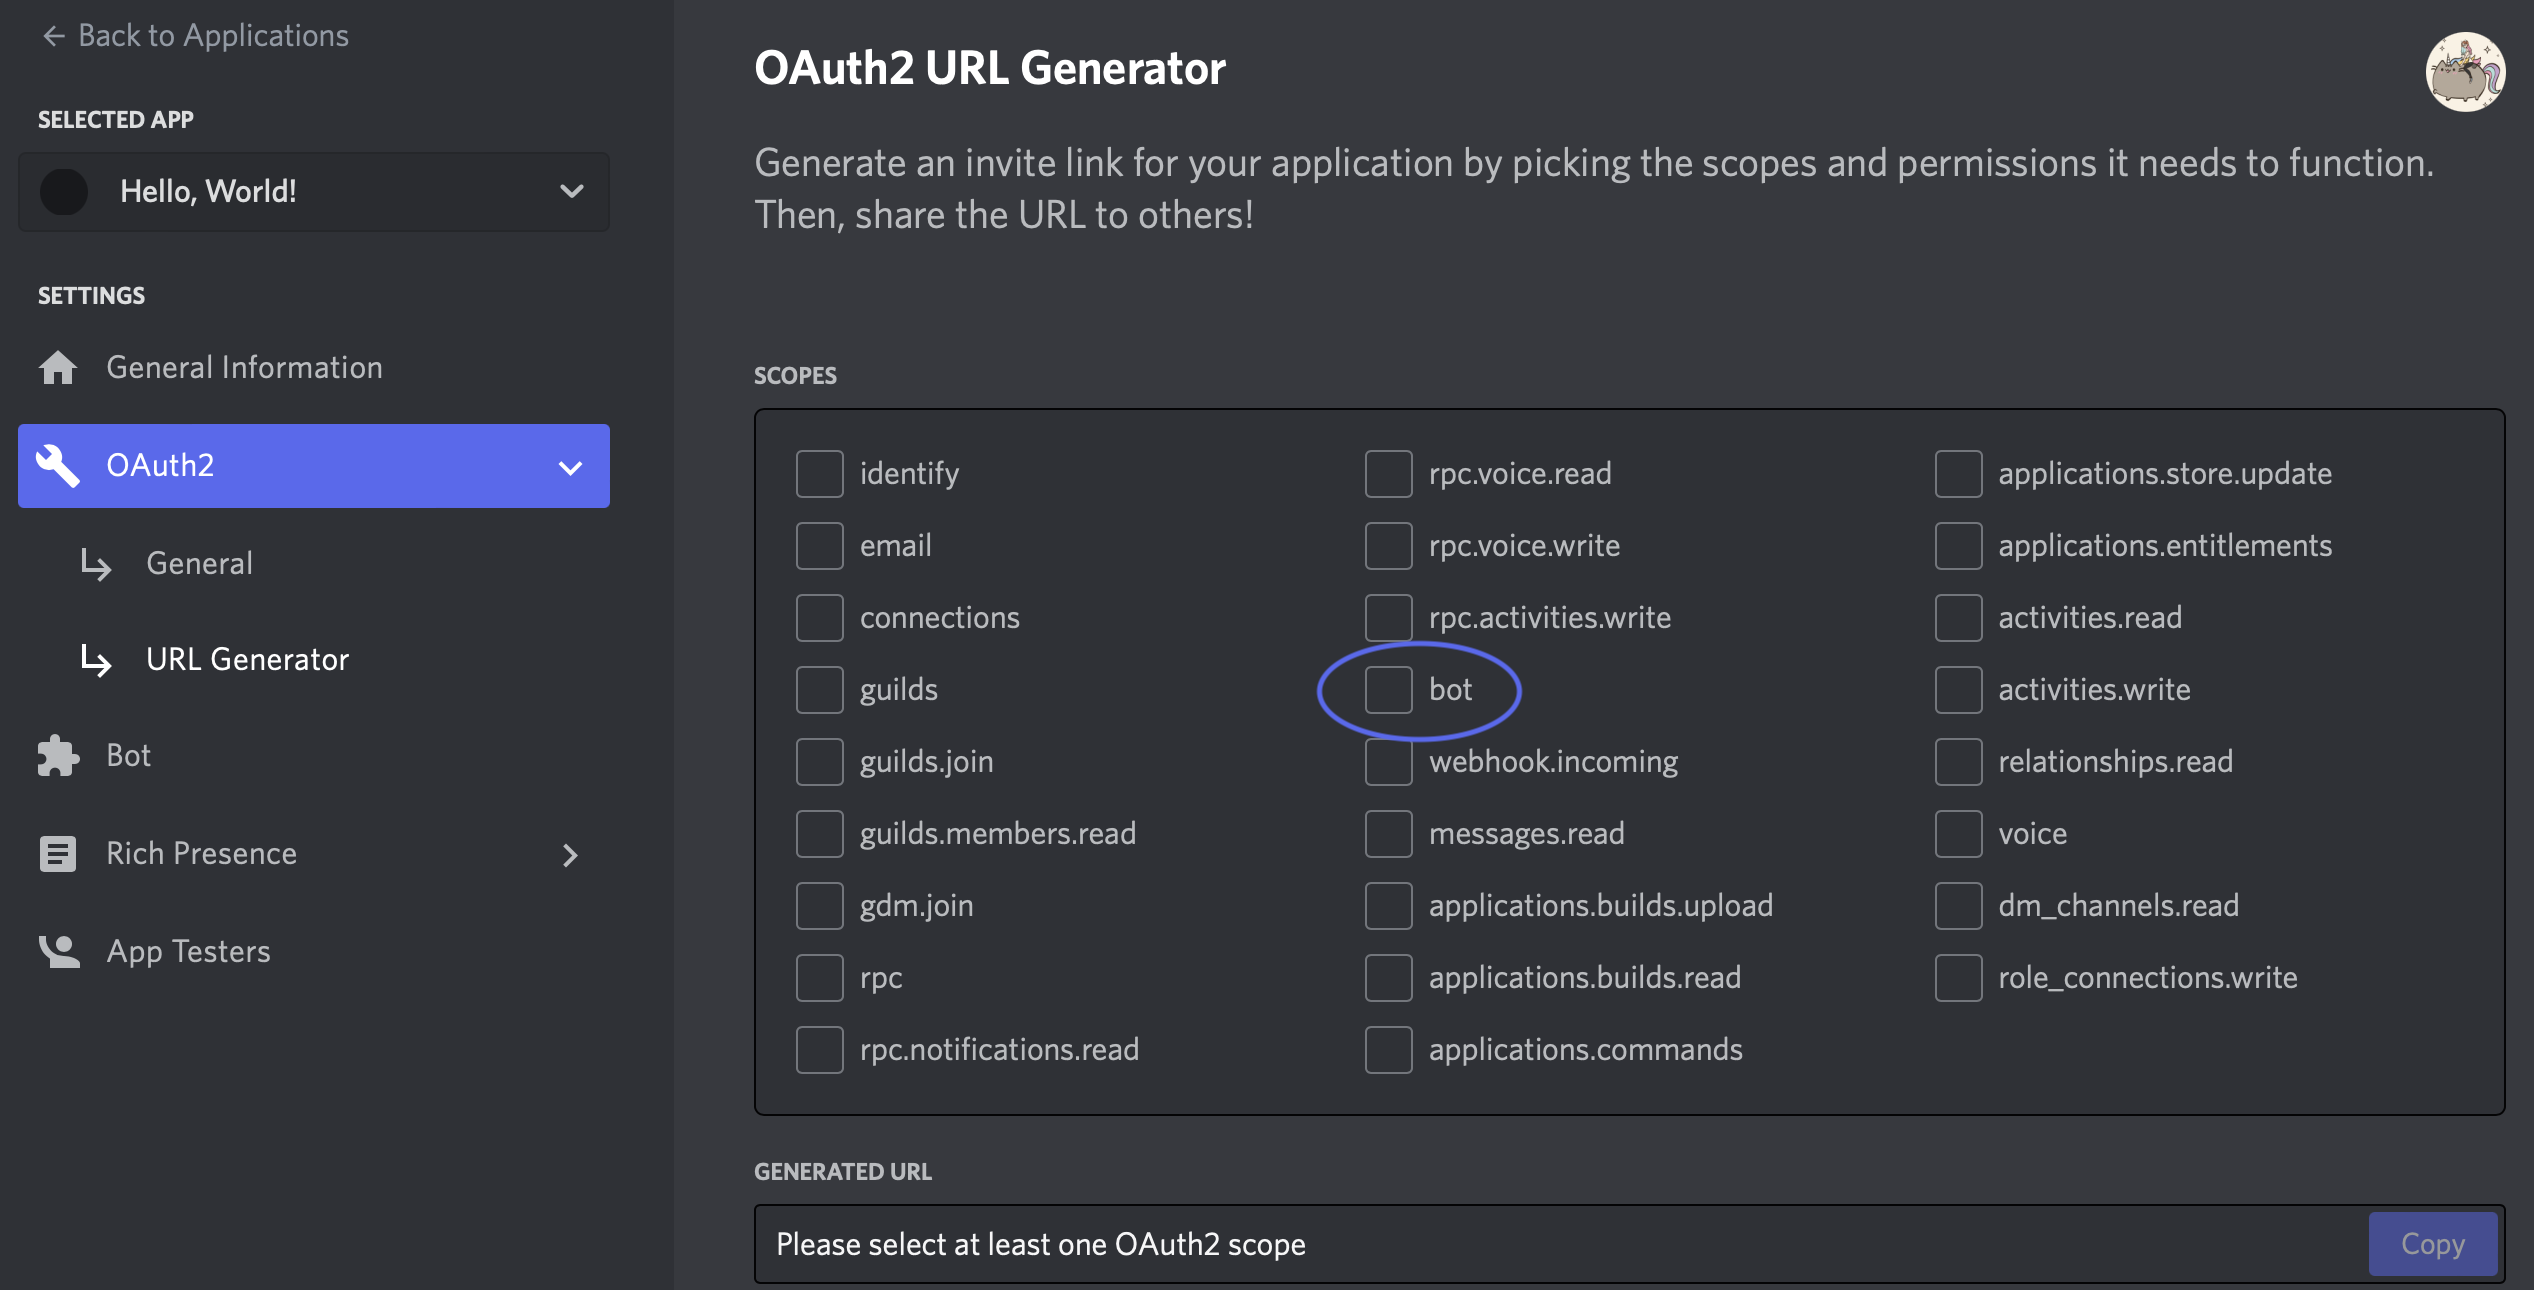
5. You’ll now see various Permissions appear. For now, select Send Messages only.
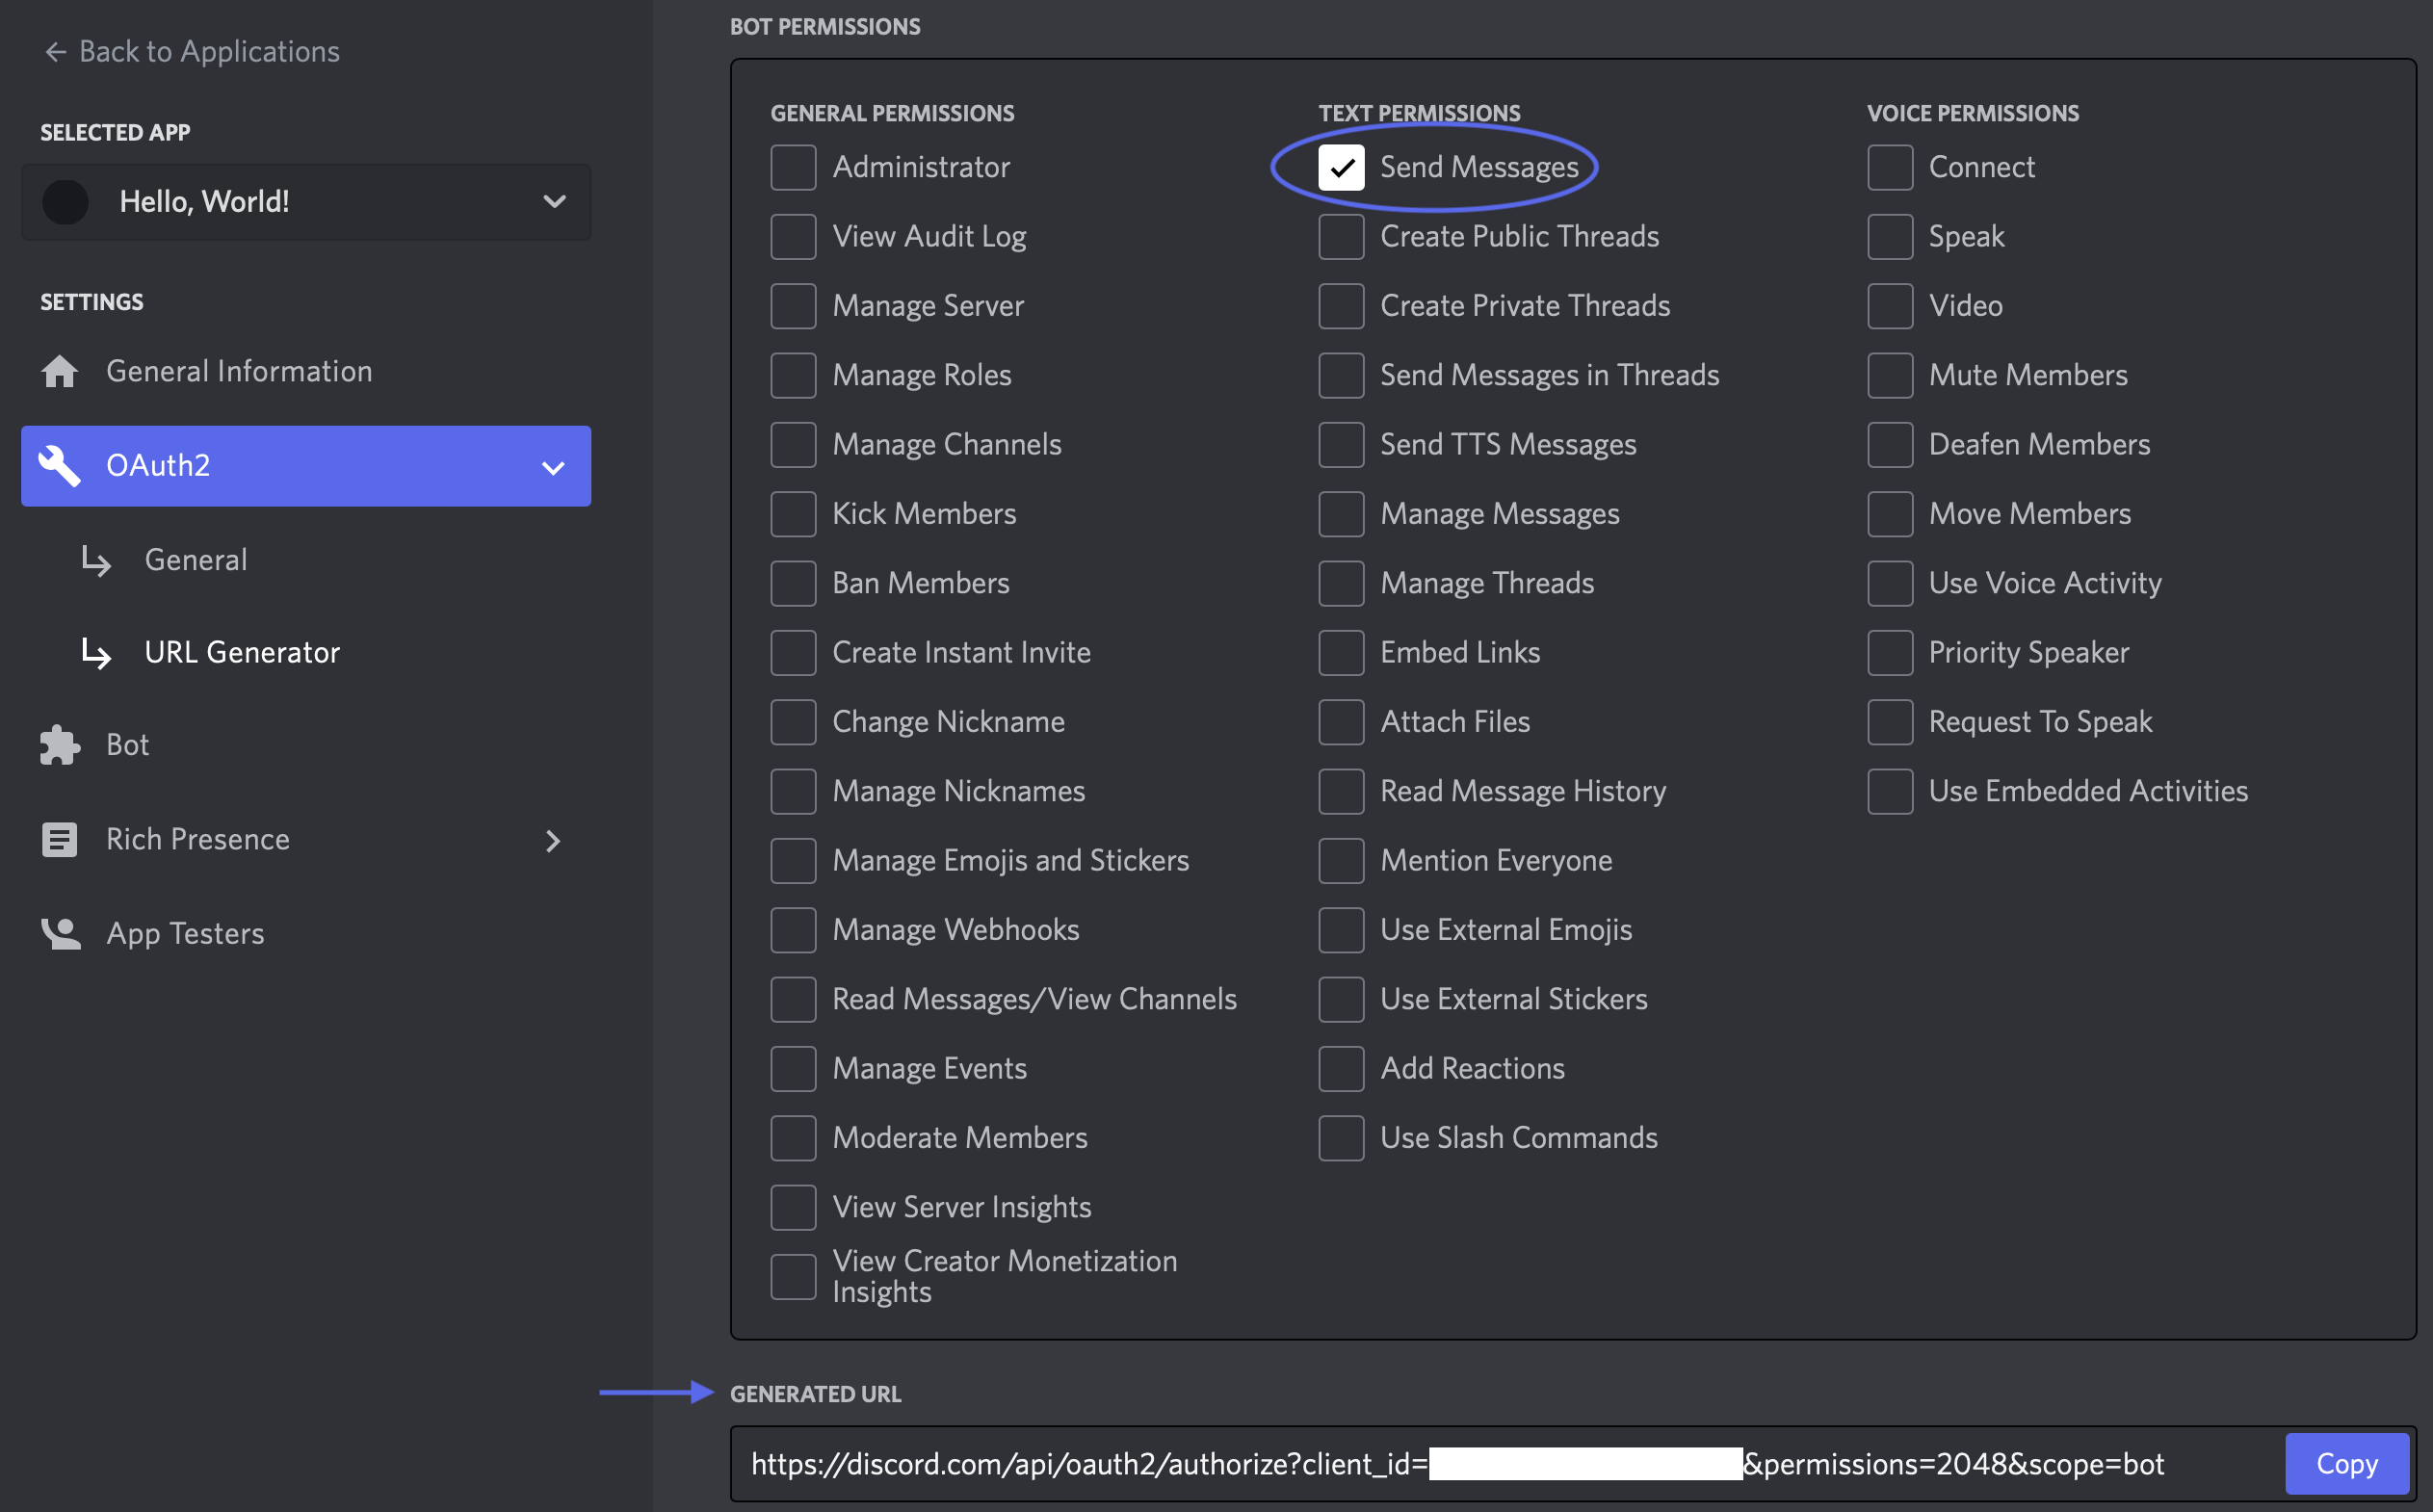
6. Locate the Generate URL section at the bottom of the page. Select Copy, and paste this URL into a new tab in your web browser.
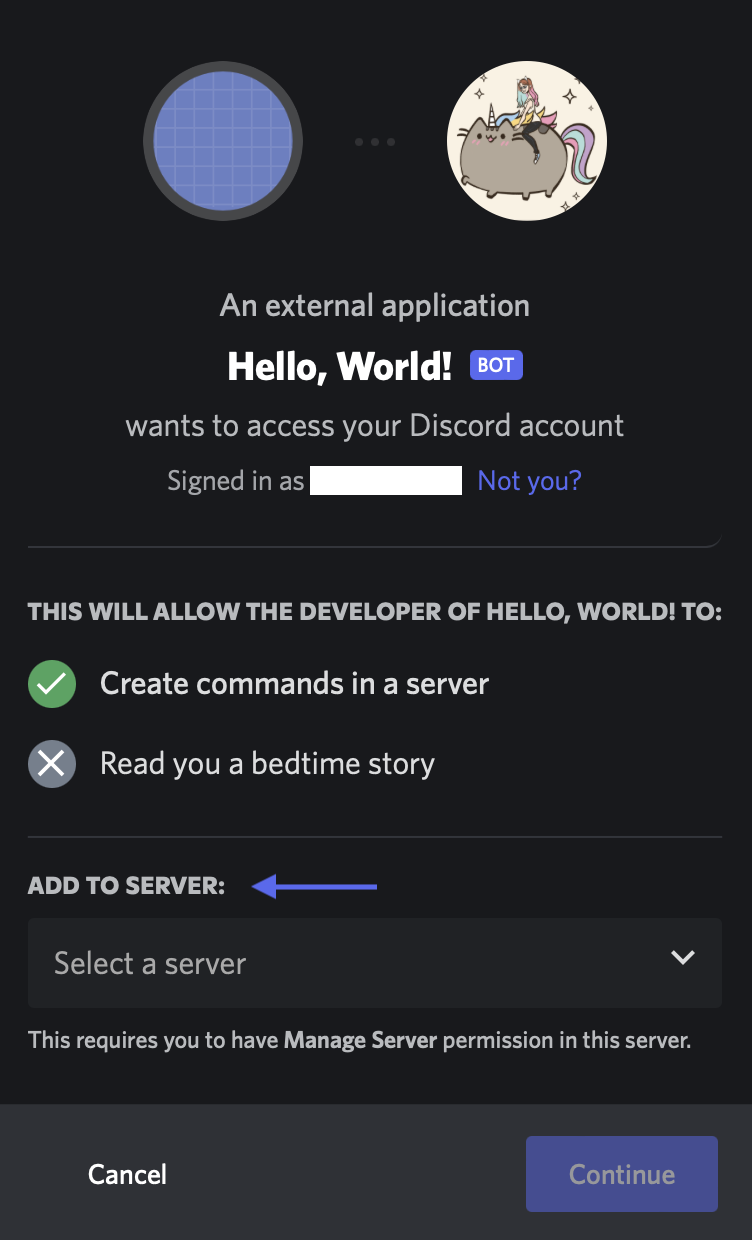
7. Select the server you’d like to host your bot under the Add-to-Server drop-down, then click Continue. Finally, select Authorize to confirm. You may need to complete a CAPTCHA.
You should see a message in your server’s main text channel confirming that your bot joined your server. It will also be listed in the server members on the right.
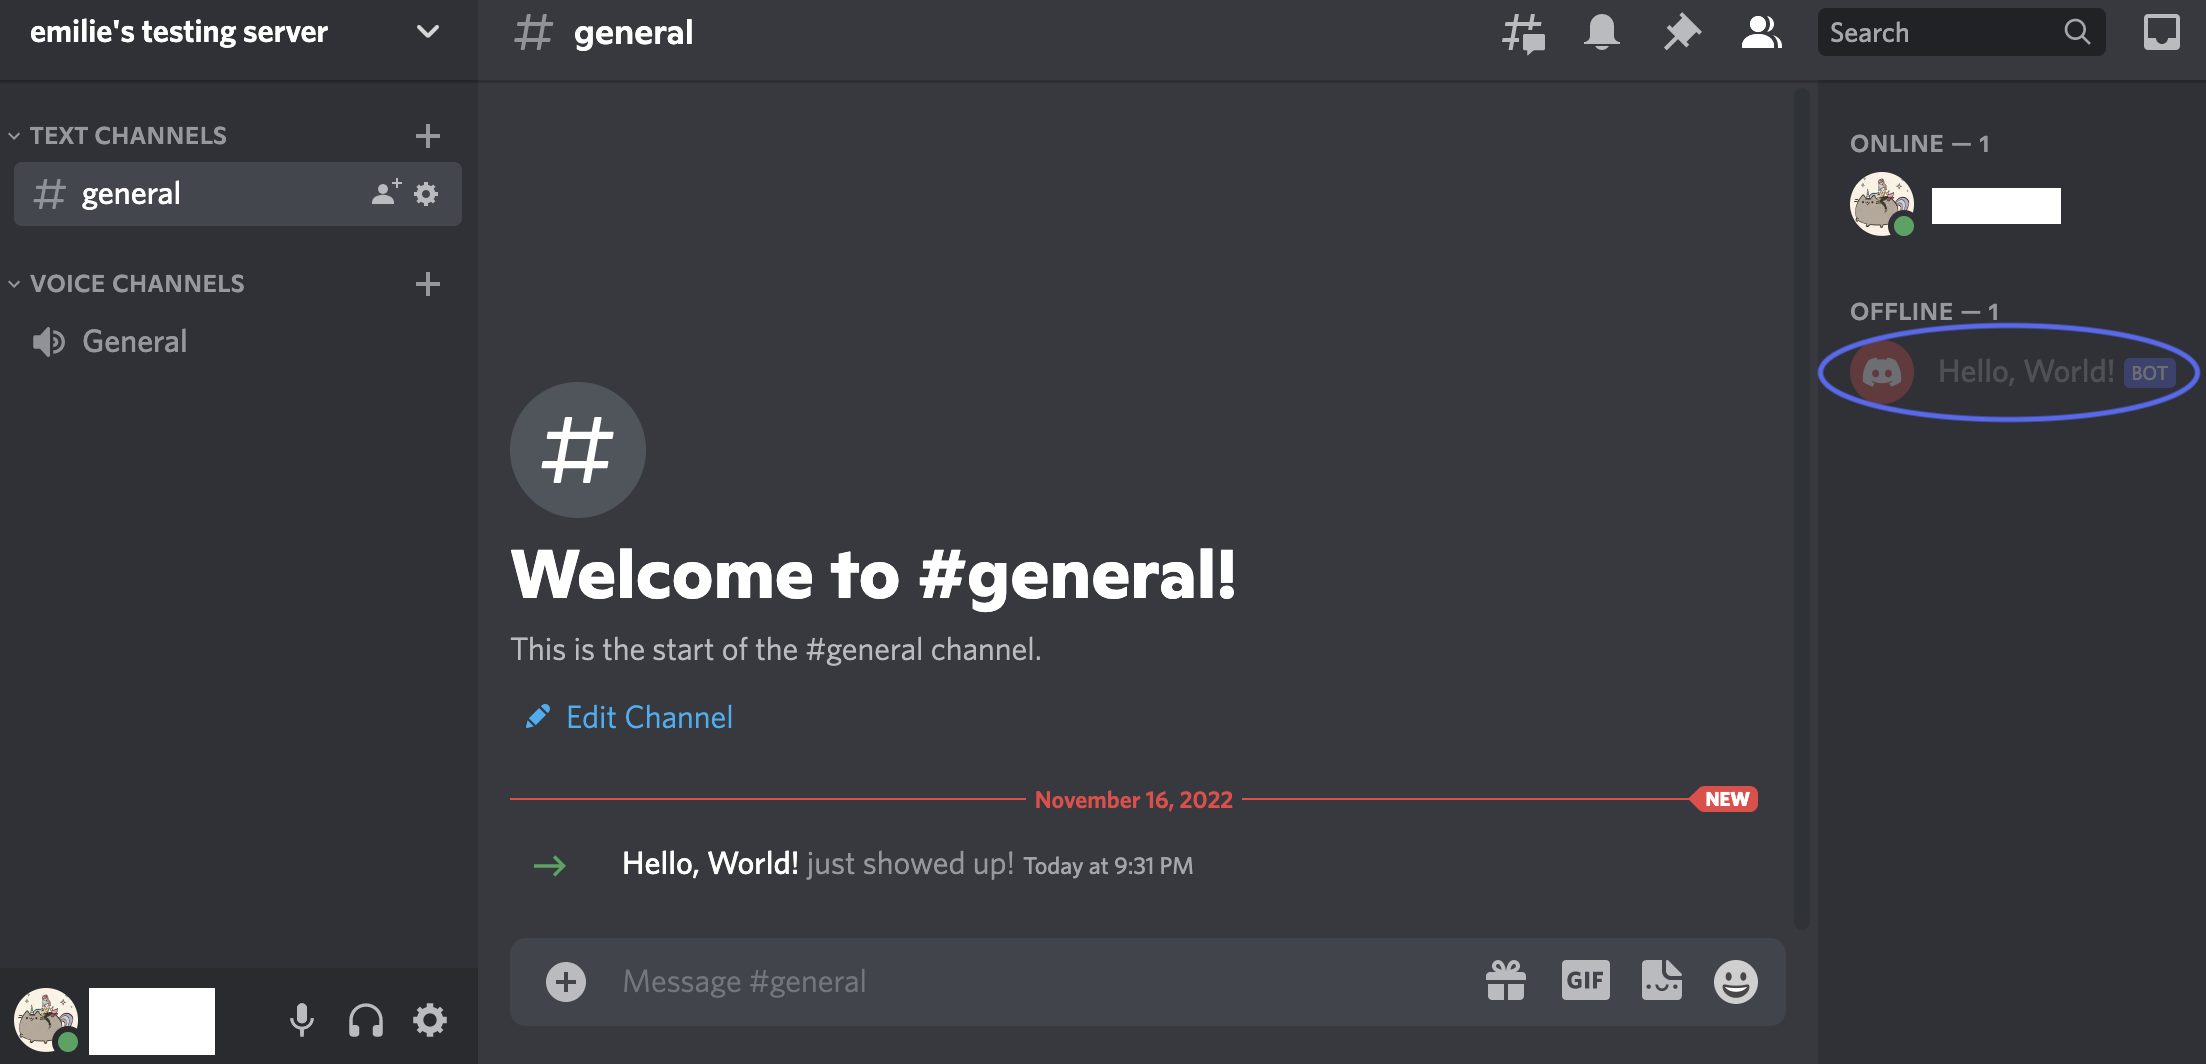
Note: If you want to enable more functions in your bot, you’ll need to come back to the Permissions section in the Developer Portal and select the relevant permissions. You will also need to copy the new URL and repeat the above steps to connect and authorize your bot to perform certain actions in your server. It is best practice to only select the permissions you actually use. Refer to the Discord Documentation to learn more about what each permission does.
Set Up Python
Access Command Line
Computer operating systems allow command line access in different ways. Follow the instructions for your operating system below.
Mac
1. On your keyboard, press Command and the space bar to open Spotlight search. Type terminal and press the enter key on your keyboard. This will open a new Terminal window which acts as a way to access the command line on a Mac.Windows
1. In your Windows search bar, search for command prompt. Click on the application icon to open it.Install discord.py Library
We will use pip, the preferred installer program for Python, to download the discord.py Python library. This allows our code to interact with Discord.
2. Type the following in your command line window and press the enter key:
pip install -U discord.py
Install dotenv Library
While this step is optional, it is best practice to install this library to separate our private API token from our Python code.
In your command line window, type the following command and press the enter key:
pip install -U python-dotenv
Write Code!
We finally get to code!
Edit Initial Templates
We’ll create two files: an .env file that will store our API token, and a .py file into which we’ll write our Python code. You could store your API token directly in the .py file, but separating it into a different file enables you to share your Python code without sharing your private API token. Create one folder that will hold these files.
Create .env File
1. Create a text file named .env in the folder of your choice. Add the following two lines to this file:
# Private API token generated from Discord Developer Portal:
DISCORD_TOKEN=<paste-your-token-here>
2. Replace <paste-your-token-here> with your unique API token string.
Create .py File
1. Next, create a Python file named hello_world.py in the same folder. Add the following code to this file:
import os
import discord
from dotenv import load_dotenv

load_dotenv()
TOKEN = os.getenv('DISCORD_TOKEN')

intents = discord.Intents.default()
intents.message_content = True
client = discord.Client(intents=intents)

@client.event
async def on_ready():
    print("The bot has logged in!") # outputs to local command line
    server = client.guilds[0] # gets your server
    first_channel = server.text_channels[0] # gets first text channel
    await first_channel.send("Hello, World!") # outputs to Discord

client.run(TOKEN)
Note: The code requires the first three import lines. The next two lines support in hiding your personal token from this file by pulling it from the env file created earlier. The next three lines link to the Discord client with specific permissions. @client.event is a decorator function, meaning it takes other functions, like on_ready, as arguments. This is how Discord handles events. Finally, the client runs with your token.
2. Run your code by typing the following into your command line and pressing the enter key:
Mac
python3 hello_world.py
Windows
py -3 hello_world.py
Successful code will display the message “The bot has logged in!” on your command line, and your bot will post a message in your Discord server:

Bot Suggestions
Looking for more ideas for your bot? More basic examples are below. Note that you will need to update your bot permissions in the Discord Developer Portal for some.
Respond to Messages
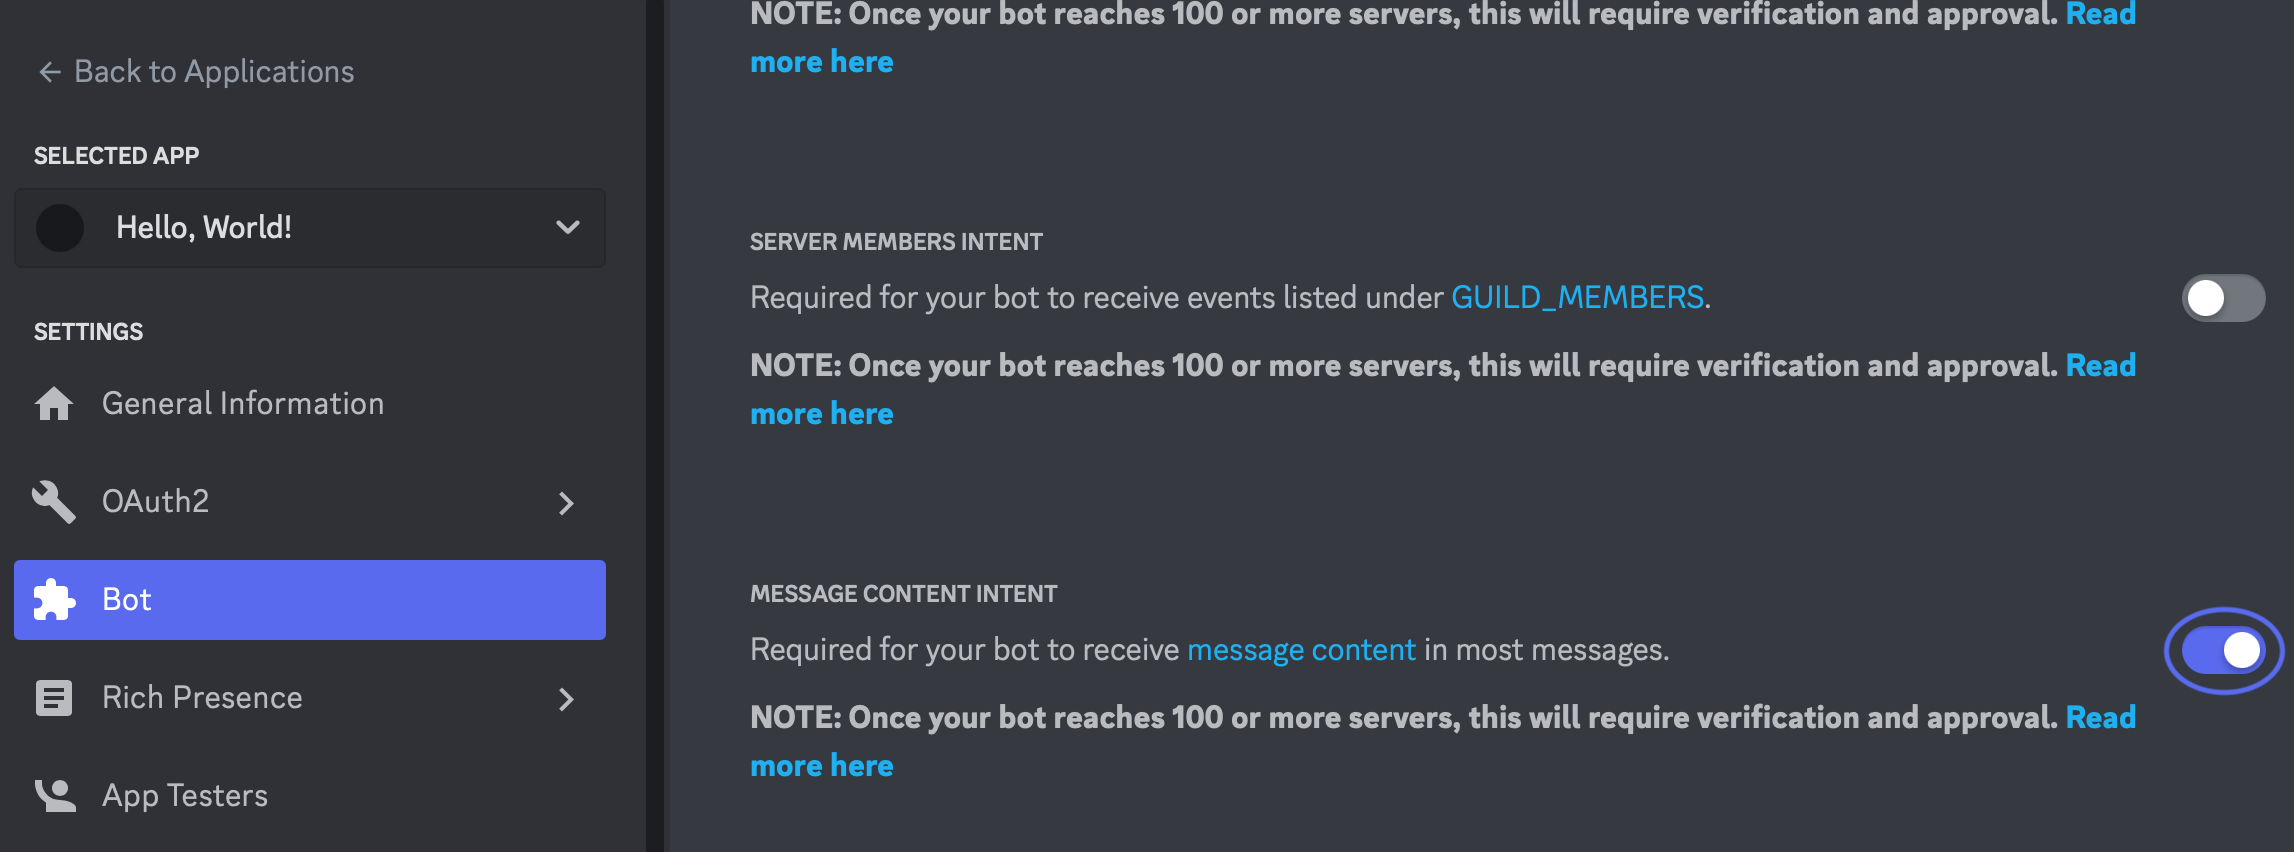
To have your bot respond to messages, ensure both send messages and read message history permissions are allowed. You also need to enable message content intent under the Bot settings in your Discord Developer Portal:
Then, add the following code to your Python file:
intents = discord.Intents.default()
intents.message_content = True # you need to enable this intent in your code as well
client = discord.Client(intents=intents)

@client.event
async def on_message(message):
    if message.content == "Hello":
        await message.channel.send("Hi there!")
If a user sends the message Hello in the server, the bot will reply with Hi there!. You can add to this code so your bot responds to multiple messages with distinct responses.
Tag @everyone
You can code your bot to send a message that tags @everyone on the server, which can be useful for announcements. This requires enabling an additional permission, mention_everyone, but otherwise works similarly to sending a normal message. The following code shows this tag added to our original message:
@client.event
async def on_ready():
    server = client.guilds[0] # gets your server
    first_channel = server.text_channels[0] # gets first text channel
    await first_channel.send("Hello, @everyone!") # tags everyone
Respond to Commands
In the previous examples, we created a client object in our code to communicate with Discord. To utilize bot commands, we will instead use a bot object. You also need to enable message content intent under the Bot settings in your Discord Developer Portal (see Respond to Message). Below is a full Python file that has creates three commands:
import os
import discord
from dotenv import load_dotenv
from discord.ext import commands

load_dotenv()
TOKEN = os.getenv('DISCORD_TOKEN')

intents = discord.Intents.default()
intents.message_content = True #
bot = commands.Bot(command_prefix='$', intents=intents) # $ can be changed

@bot.command()
async def hello(ctx): # ctx, short for Context, is required to read the message
    await ctx.send("Hello, World!")
@bot.command()
async def bye(ctx):
    await ctx.send("Goodbye!")
@bot.command()
async def name(ctx, arg): # you can also add arguments
    await ctx.send("Hello, " + arg + "!")

bot.run(TOKEN) # we call run on bot instead of client
On the server, invoke a command by typing $ followed by the name of the command:

For more examples, refer to the discord.py documenation.